No-Bake Mini Cheesecakes

Who needs an oven when you’ve got these No-Bake Mini Cheesecakes? They’re the perfect solution for those days when you want something sweet but can’t be bothered to turn on the oven or even leave the couch. With a buttery graham cracker crust and a smooth, dreamy filling, these cheesecakes are so easy, you’ll wonder why you’ve been making the big, complicated ones all these years. Just whip, chill, and eat—no baking, no stress, just pure, mini cheesecake magic!

For the Graham Cracker Crust
1 ½ cups graham crackers (about 10 to 12 whole crackers)
8 Tbsp unsalted butter
2 Tbsp sugar

Ingredients for No-Bake Cheesecake
16 oz cream cheese (2) 8 oz Blocks, room temperature
⅔ cup sugar
2 Tbsp sour cream
2 Tbsp lemon juice
1 cup heavy whipping cream

Instructions:

  1. Line your muffin tin with paper liners. If you don’t have a spare muffin tin to make 14 total, you can put the extra 2 into ramekins.
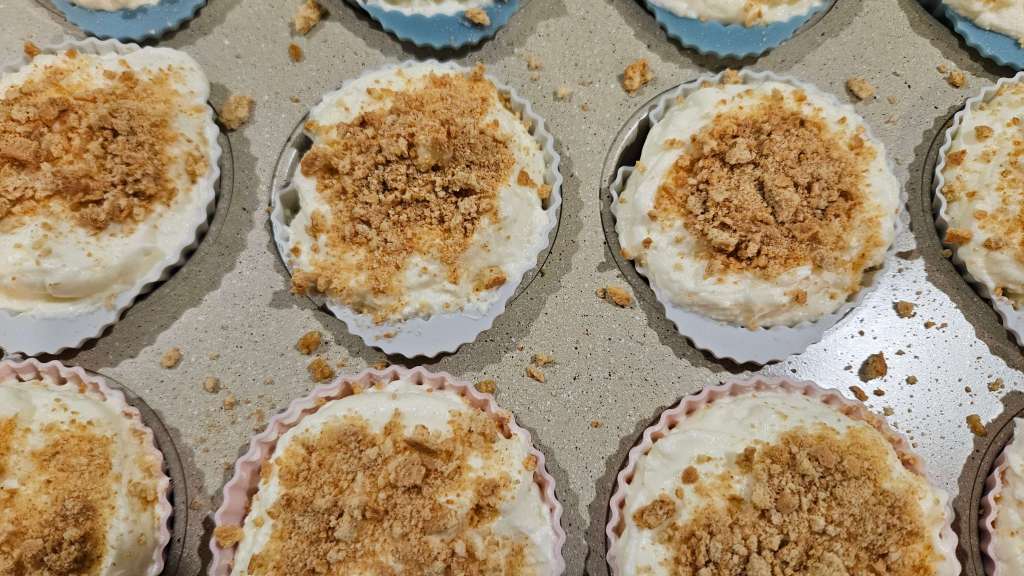
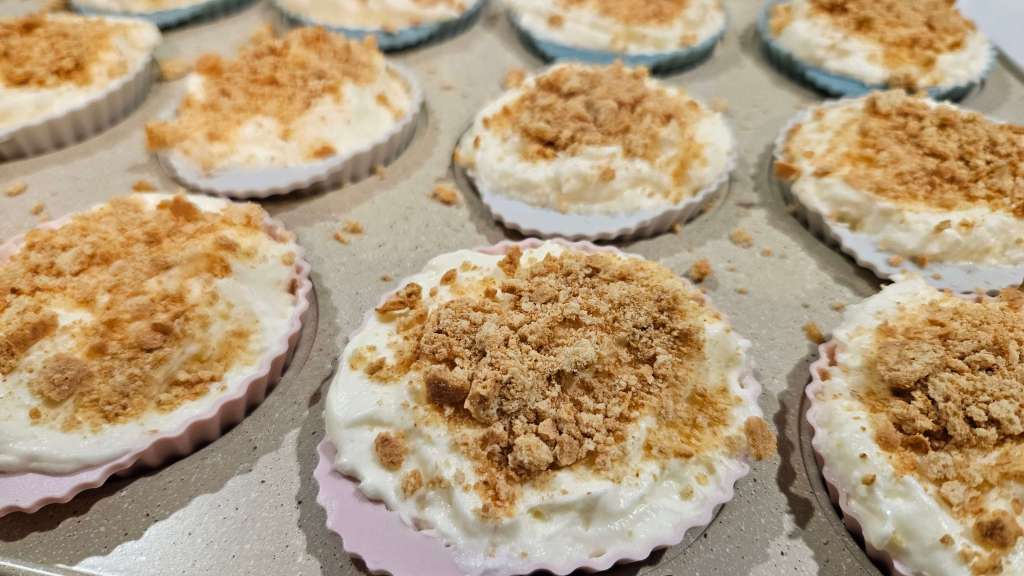
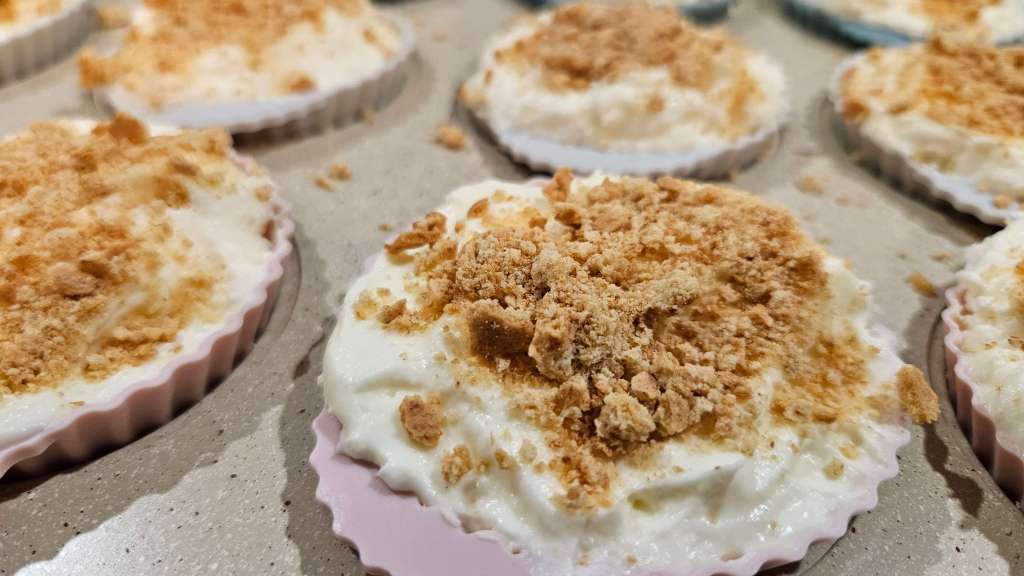
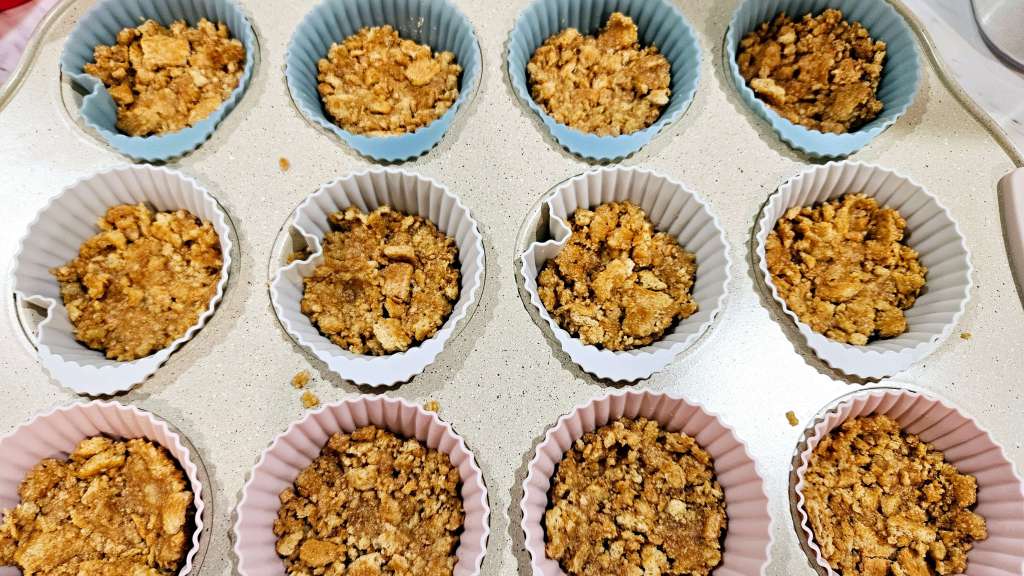
  2. In a medium bowl, stir together graham crackers and sugar then add melted butter and stir until crumbs are evenly moistened. Divide the crumbs between your paper liners (about 2 Tablespoons in each). Press the crumbs evenly into the bottom of the liners to form the crust.
  3. In a large mixing bowl, beat the cream cheese and sugar with an electric hand mixer on medium/high speed for 3 minutes until fluffy and completely smooth, scraping down the bowl as needed. Add sour cream and lemon juice and beat for another minute until well incorporated.
  4. Wash the mixer attachments and then in a second large mixing bowl, beat heavy whipping cream on medium-high speed for about 3 minutes, or until whipped and stiff peaks form.
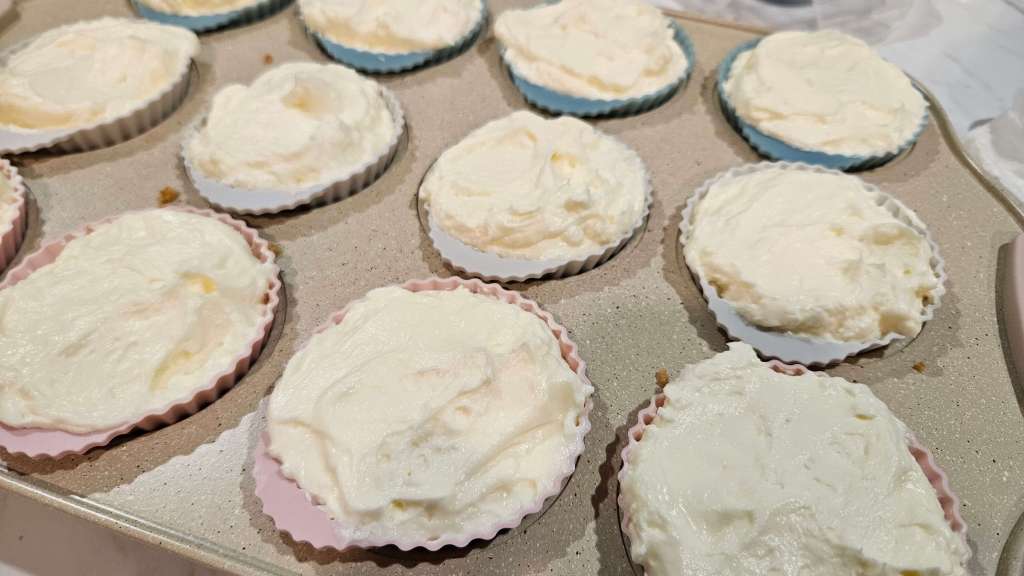
  5. Using a spatula fold the whipped cream into the cream cheese mixture until fully combined, scraping from the bottom of the bowl as you mix. Divide the cheesecake mixture evenly between your cupcake liners (a trigger-release ice cream scoop makes this easy!). Even out the tops with the back of a spoon. The cream cheese should be about level with the tops of the cupcake liners. I topped mine with some crushed graham crackers, this is completely optional.
  6. Refrigerate the mini cheesecakes for at least 6 hours or overnight (set a reminder to cover with plastic wrap after a couple of hours in the refrigerator).
  7. ENJOY!

Peanut Butter Blossom Cookies

There’s something truly magical about the combination of peanut butter and chocolate, and Peanut Butter Blossom Cookies capture that perfect balance in every bite. With a soft, chewy peanut butter cookie base coated in sugar and topped with a Hershey’s Kiss, these cookies are an irresistible treat that’s both sweet and salty. Whether you’re baking for the holidays, a special occasion, or just because, these classic cookies are sure to please everyone around the table. Simple to make, yet full of flavor, Peanut Butter Blossom Cookies are the ultimate comfort dessert for any time of year!

Here are the ingredients you’ll need:

Nonstick cooking spray
2 3/4 cups all-purpose flour
1 1/4 teaspoons baking soda
1/2 teaspoon fine salt
1 cup smooth peanut butter
12 tablespoons (1 1/2 sticks) unsalted butter, at room temperature
1/4 cup vegetable shortening
1 3/4 cups packed light brown sugar
2 large eggs
1 tablespoon vanilla extract
48 to 60 chocolate kiss candies (depending on the size you make)

Directions

1.  Adjust the oven racks to the upper and lower thirds and preheat the oven to 375 degrees F. Coat 2 baking sheets with cooking spray (I used my silicone baking mats)

2. Combine the flour, baking soda, and salt in a medium bowl. Set aside. 

3. Beat the peanut butter, butter, and shortening in a large bowl with an electric mixer on medium-high until smooth, about 1 minute. Add the brown sugar and continue to beat until light and fluffy, about 4 minutes. Add the eggs and vanilla and continue to beat until incorporated. Add the flour mixture in two batches and beat on medium until incorporated. 

4. Scoop out level tablespoons of dough, roll them into balls, and space about 2 inches apart on the prepared baking sheets. (You will need to bake the cookies in batches; allow the baking sheets to cool between batches.) 

5. Bake until the bottoms and edges of the cookies are golden brown but the middles are still soft about 10 minutes. (The cookies will bake a bit after they come out of the oven). Indent the warm cookies with a chocolate kiss candy. 

6. Allow the cookies to cool on the baking sheet for a few minutes and then transfer to a rack to cool completely.

Mmmm, enjoy!

Chocolate Chip Cookies (The yummiest!)

If you’re looking for a simple, straightforward recipe for the most delicious chocolate chip cookies, then you’re in the right place! 

These are everything a chocolate chip cookie should be, crisp and chewy, buttery, and sweet. And, by far the easiest and yummiest chocolate chip cookies I’ve made to date!

Here is a list of ingredients that you’ll need:

1 Cup salted butter – Softened
1 Cup White Sugar (Granulated)
1 Cup Light Brown Sugar (Packed)
3 Cups all-purpose flour
2 ½ tsp. pure vanilla extract
2 Large eggs
1 tsp. Baking soda
½ tsp. Baking powder
1 tsp. Salt (fine sea salt)
2 Cups chocolate chips (or chopped chocolate)

INSTRUCTIONS

1. Preheat over to 375 F. Line a baking sheet with parchment paper and set aside.
2. In a small bowl, mix flour, baking soda, baking powder, and salt. Stir well. Set aside
3. Cream together BOTH sugars and butter until well combined.
4. Beat in eggs (one at a time) and vanilla until fluffy
5. Mix in dry ingredients until well combined.
6. Add chocolate chips and mix well.
7. Roll 2-3 Tbs. (this will depend on how big you want your cookies) of dough at a time into balls and put them evenly spaced onto the cookie sheet. (I used a small ice cream scoop for the perfect and most uniform shape)
8. Bake in a preheated oven for 8-10 minutes. Take them out when they BARELY start to turn brown. DO NOT over-bake these, even though they may seem under-baked.
9. Let them sit on the baking sheet for 2 minutes before transferring them to a cooling rack.